
Approve expenses in chat with a workflow
An expense claim shouldn’t be an email thread. With a workflow, someone clicks Run, fills in a short form, their manager gets a Review button in a direct message, and finance hears about it the moment it’s approved. This builds that workflow at Northwind Traders from the Expense approval template. Any member can build it; an admin can change it later.
Before you start
Section titled “Before you start”- Members can make workflows unless an admin set Who can make workflows to Only admins in Workspace settings → General → AI & workflows → Workflows.
- Decide who approves: one manager, or any of a few. Up to 10 people can be asked.
- Make the channel finance works in, like #finance, if it doesn’t exist. A workflow can only post in a private channel when the person who saves it is in it.
1. Start from the template
Section titled “1. Start from the template”Click Workflows in the rail on the left. Under Start from a template, pick Expense approval: a form for the amount, an approval, then a message for whoever pays it. It opens in the builder for you to change before you save. Give it a name and an emoji, which is its picture on the messages it posts.
The workflow Starts From a button, so people find it on the Workflows page under You can run, and in a channel’s Workflows button at the top if you pick one.
2. Shape the form
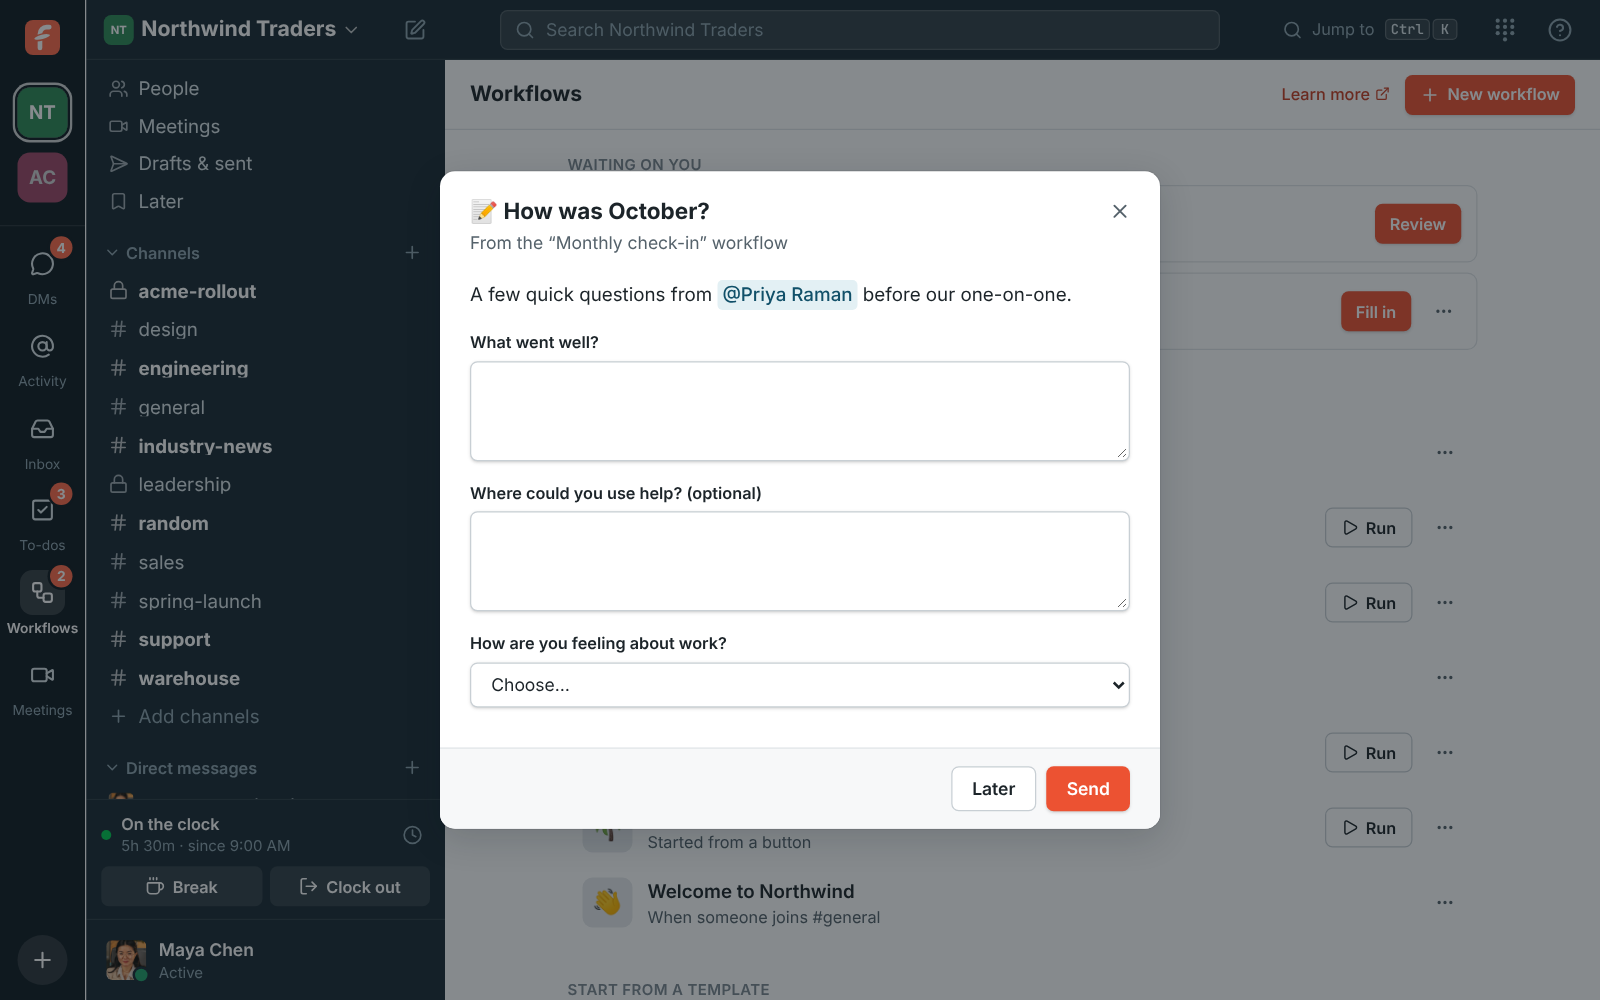
Section titled “2. Shape the form”The first step is Send a form, for the Person who started it. Keep the questions short: what it was for (a short answer), the amount (a number), the date (a date), and a choice from a list for the kind of expense, like Travel, Meals or Equipment. When the person who clicked Run fills it in, it opens for them right away.
3. Ask for approval
Section titled “3. Ask for approval”The next step is Ask for approval. Under Who has to approve, pick the manager, or Someone specific. With several people, Any one of them means the first answer decides; All of them needs everyone, and one rejection rejects.
Put what the request is about in the message, using the { } button beside the text box to drop in the form’s answers: the amount, what it was for, and who asked. Then set:
- Remind them after: sends the request again to anyone who hasn’t answered.
- Stop waiting after: from 1 hour to 30 days. Then rejects it, approves it, or sends it to someone else, who gets the same choice with no time limit. Sending it to a second manager keeps claims from sitting over a holiday.
The approver gets a direct message with the request and a Review button, and it shows under Waiting on you on their Workflows page. They read it, add a comment if they like, and click Approve or Reject. Once someone decides, the card says who did, so nobody answers twice.
4. Tell people what was decided
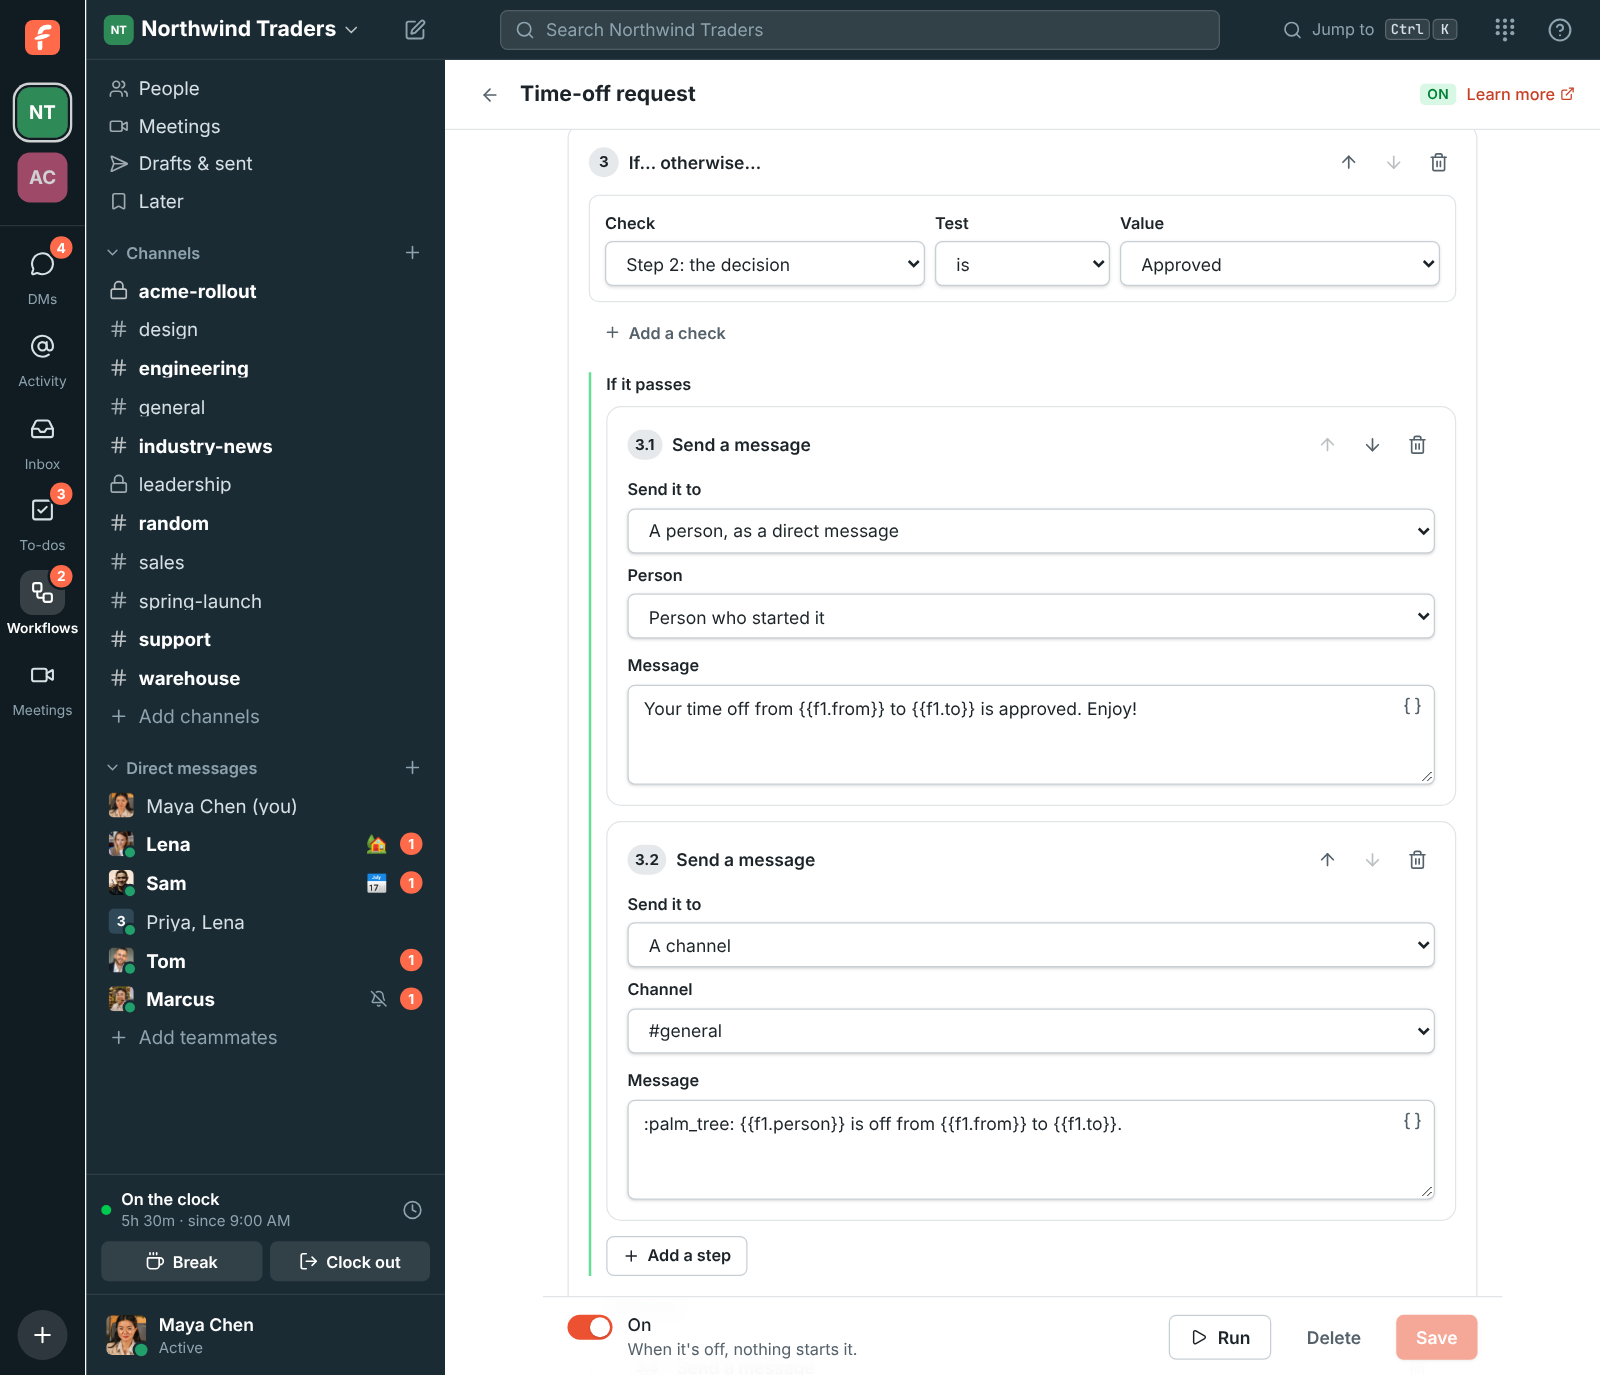
Section titled “4. Tell people what was decided”Add an If… otherwise… step that checks the approval: the decision {{a1.decision}} is
Approved. Under If it passes, add two Send a message steps: a direct message to the
person who started it saying it was approved, with who decided ({{a1.person}}), and a message
to #finance with the amount and what it was for from the form, so whoever pays it has everything
in one place. Under Otherwise, send the person a direct message with the rejection and the
comment, {{a1.comment}}.
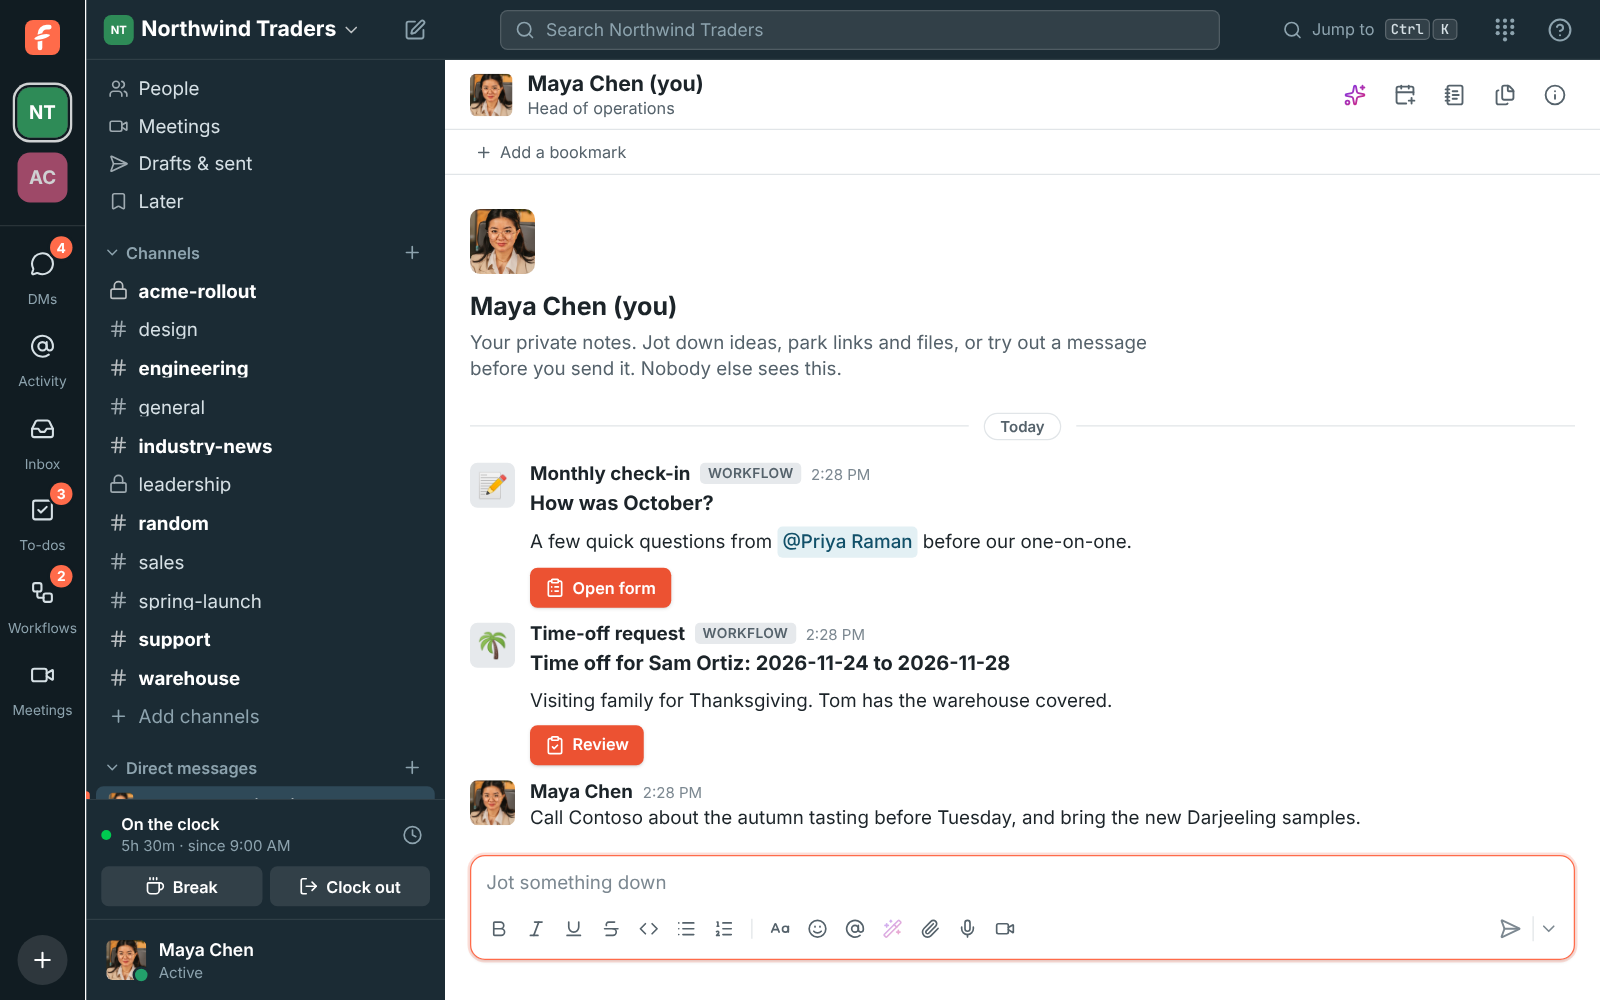
Direct messages from a workflow arrive in the person’s own notes DM, from the workflow, and messages it posts show its name and emoji with a Workflow label.
5. Turn it on and try it
Section titled “5. Turn it on and try it”Click Save, then the On switch at the bottom. A workflow can’t be turned on while something is missing, like a step without a channel; the builder points out each problem under the step. Click Run yourself, fill in a test claim, and watch the approval land in the manager’s DM.
- Numbers compare as numbers, so a second If… otherwise… with the amount is more than 500 can send big claims to a director instead.
- The bottom of the builder lists the last 50 Runs: click one to see each step, who filled in the form, and where it stopped. Stop this run ends one that’s waiting.
- Show the workflow in one channel so people find it under the channel’s Workflows button.
- The Time-off request template works the same way for leave.
See Approvals, Forms and If… otherwise… for every option.
Answers come from the Freesbe guides and are written by AI, so check the linked guide before relying on one. Please don't include personal details such as emails or passwords.